
How To Install Artificial Grass
So, you’ve bought your artificial grass and you’re now slightly worried about how to install it. Fear not, as this guide will show you how to install fake grass on both soil and concrete, from the very beginning to the very end!
If you prefer video tutorials, we have the perfect one for you. Below it shows you how to install artificial grass in your garden step by step. You will be able to easily follow along and learn the process.
How To Lay Artificial Grass On Soil
Tools Required
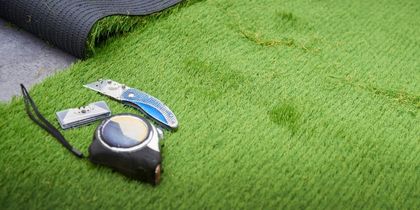
Before you begin your astro turf installation, it is important that you have all of the following items to hand:
- Artificial grass rolls
- Utility knife
- Hammer
- Joining staples
- Broom or brush
- Joining tape
- Shovel
- Weed membrane
If there is no existing raised perimeter in the area that you plan to install garden artificial grass in, you will need to create one, as the edges of the turf sheets need something to butt up against. We will go into more detail about making an edge later in the guide.
Step 1: Preparation
To begin, make sure any water pipes or underground cables are below the total depth you are planning to dig. When removing the existing real grass, we would recommend digging to a depth of a minimum of 50mm.
Step 2: Ensure The Area Is Clear And Flat
Prior to laying anything down or creating any edges, you should make sure that the ground area that you are going to be laying your fake grass on is as flat and clear of debris as can be. For domestic applications, this can be done with a broom or stiff brush, clearing any large stones, etc. For larger commercial applications, a garden roller may be more appropriate to save time.
Step 3: Creating An Edge
For creating an edge, we recommend using timber, as it is very cost-effective and can be cut to size easily. The garden edging should match up to the height of any already existing edges and be secured to the ground using timber stakes and a hammer.
Step 4: Spread The Sand Infill
You should now spread and flatten a layer of sand infill or 6mm chipping across the entire area that the artificial grass rolls are going to be laid on. The amount of sand and chipping that you should use will depend on the thickness of the artificial grass you have chosen.
For example, as we recommended digging a total depth of 50mm, if you have chosen 35mm of thick artificial grass, you should use 15mm of infill to make up the rest of the 50mm depth. This filling should be levelled with a sweeping brush as much as possible to help with the drainage of rainwater.
Step 5: Roll Out The Weed Membrane
Once you have created your flat sand base, you can lay down the weed membrane to fill the area, which will need to be secured to the ground by hammering in nails around the perimeter every 750mm.
If separate membrane sheets need to be joined together, overlap the two edges and stick them together using gaffer tape. Not only will this prevent weeds from growing through the artificial lawn, but it will also improve water drainage. Any excess weed membrane can be trimmed off the edges.
Step 6: Lay The Artificial Grass
Unroll the artificial grass roll towards the house while being mindful not to disturb the weed membrane. After all of the new grass is in position, trim off any excess at the edges. If the area you are covering is wider than 4 metres and you have used multiple rolls of grass, they will need to be joined together using self-adhesive tape. This can be done by lining up the edges of the two pieces of grass together and then folding the edges apart.
In the gap you have created between the two pieces of grass, roll out self-adhesive tape along the length of the sheets with the sticky side facing up. From here, you can unfold the edges of the grass rolls and lay them on the tape, making sure that they line up as closely as possible.
Step 7: Hammer In Joining Staples
To finish the installation, you will need to hammer in staples all the way along the seam to complete the join. We recommend using a joining staple every 50-75mm. If you encounter a stone while trying to hammer a staple in, simply pull the staple out and find another spot along the seam.
How To Lay Artificial Grass On Concrete
Tools Required
Before you begin your astro turf installation, it is important that you have all of the following items to hand.
- Artificial grass rolls
- Utility knife
- Hammer
- Joining staples
- Broom or brush
- Adhesive primer
- Turf adhesive
- Notched trowel
Step 1: Preparation
You need to make sure that the concrete is clean, dry, and free of any cracks or holes. If there are any cracks or holes, you need to fill them with a suitable filler and let it dry completely.
To clean the concrete, you can use a broom or brush to sweep away any dirt or debris. If the concrete is very dirty or stained, you can use a pressure washer to blast away any grime. Make sure you allow the concrete to fully dry before proceeding to the next step.
Step 2: Apply The Adhesive
The next step is to apply an adhesive primer to the concrete surface to help the artificial turf stick to the concrete and prevent it from peeling off. You can use a brush or a roller to apply the primer evenly across the concrete and remember to allow the primer to completely dry before moving on to the next step.
After that, you can use a notched trowel to spread the turf adhesive evenly across the primed concrete, working in sections to prevent the adhesive from drying out. Make sure to apply a thin and even layer of adhesive to the entire surface.
Step 3: Lay And Trim The Artificial Grass
You need to be careful not to disturb the adhesive or create any wrinkles or bubbles in the grass. You can start by unrolling the grass from one end of the concrete and pressing it firmly into the adhesive. Then, you can work your way to the other end, smoothing out the grass as you go.
Once the grass is fully adhered, you need to trim off any excess around the edges. You can use a utility knife to cut the grass along the edge of the concrete or any other border you have. Make sure you cut the grass neatly and accurately to avoid any gaps or overlaps.
Step 4: Secure The Astro Turf
The final step is to secure the artificial grass in place with nails or staples to ensure that the grass does not lift or move over time. You can use a hammer and nails or a staple gun and staples to fix the grass to the concrete, depending on the thickness of the concrete and the grass.
First, you should secure the edges of the fake grass, and then move inwards. There should be 50 to 75 mm of space between each nail or staple along the edge and 100 to 150 mm of space across the surface. When securing the fake grass, be careful not to damage the grass fibres or the backing.
After Installation
After you have completed your artificial grass installation, we would recommend leaving it to settle for at least 24 hours before walking on it. This is so that the adhesive and tapes are allowed to set, and the grass isn’t shifted by footsteps.

